<img loading=“lazy” src=“https://www.errenskitchen.com/wp-content/uploads/2016/12/Raisin-Scones-4-683x1024.jpg" onerror=“this.onerror=null;this.src=‘https://blogger.googleusercontent.com/img/a/AVvXsEhe7F7TRXHtjiKvHb5vS7DmnxvpHiDyoYyYvm1nHB3Qp2_w3BnM6A2eq4v7FYxCC9bfZt3a9vIMtAYEKUiaDQbHMg-ViyGmRIj39MLp0bGFfgfYw1Dc9q_H-T0wiTm3l0Uq42dETrN9eC8aGJ9_IORZsxST1AcLR7np1koOfcc7tnHa4S8Mwz_xD9d0=s16000';" alt=“Three golden-brown Raisin Scones are stacked and shown up close, highlighting their fluffy texture and studded raisins. Text overlay reads “Homemade Raisin Scones” and “Erren’s Kitchen. - 1”>

<img loading=“lazy” src=“https://www.errenskitchen.com/wp-content/uploads/2016/12/Raisin-Scones-3-683x1024.jpg" onerror=“this.onerror=null;this.src=‘https://blogger.googleusercontent.com/img/a/AVvXsEhe7F7TRXHtjiKvHb5vS7DmnxvpHiDyoYyYvm1nHB3Qp2_w3BnM6A2eq4v7FYxCC9bfZt3a9vIMtAYEKUiaDQbHMg-ViyGmRIj39MLp0bGFfgfYw1Dc9q_H-T0wiTm3l0Uq42dETrN9eC8aGJ9_IORZsxST1AcLR7np1koOfcc7tnHa4S8Mwz_xD9d0=s16000';" alt=“Two golden brown Raisin Scones, packed with plump raisins, are displayed on a parchment-lined tray. The image features the Erren’s Kitchen logo and website with the text “Homemade Raisin Scones. - 4”>
<img loading=“lazy” src=“https://www.errenskitchen.com/wp-content/uploads/2016/12/Raisin-Scones-3-683x1024.jpg" onerror=“this.onerror=null;this.src=‘https://blogger.googleusercontent.com/img/a/AVvXsEhe7F7TRXHtjiKvHb5vS7DmnxvpHiDyoYyYvm1nHB3Qp2_w3BnM6A2eq4v7FYxCC9bfZt3a9vIMtAYEKUiaDQbHMg-ViyGmRIj39MLp0bGFfgfYw1Dc9q_H-T0wiTm3l0Uq42dETrN9eC8aGJ9_IORZsxST1AcLR7np1koOfcc7tnHa4S8Mwz_xD9d0=s16000';" alt=“Two golden brown Raisin Scones, packed with plump raisins, are displayed on a parchment-lined tray. The image features the Erren’s Kitchen logo and website with the text “Homemade Raisin Scones. - 8”>
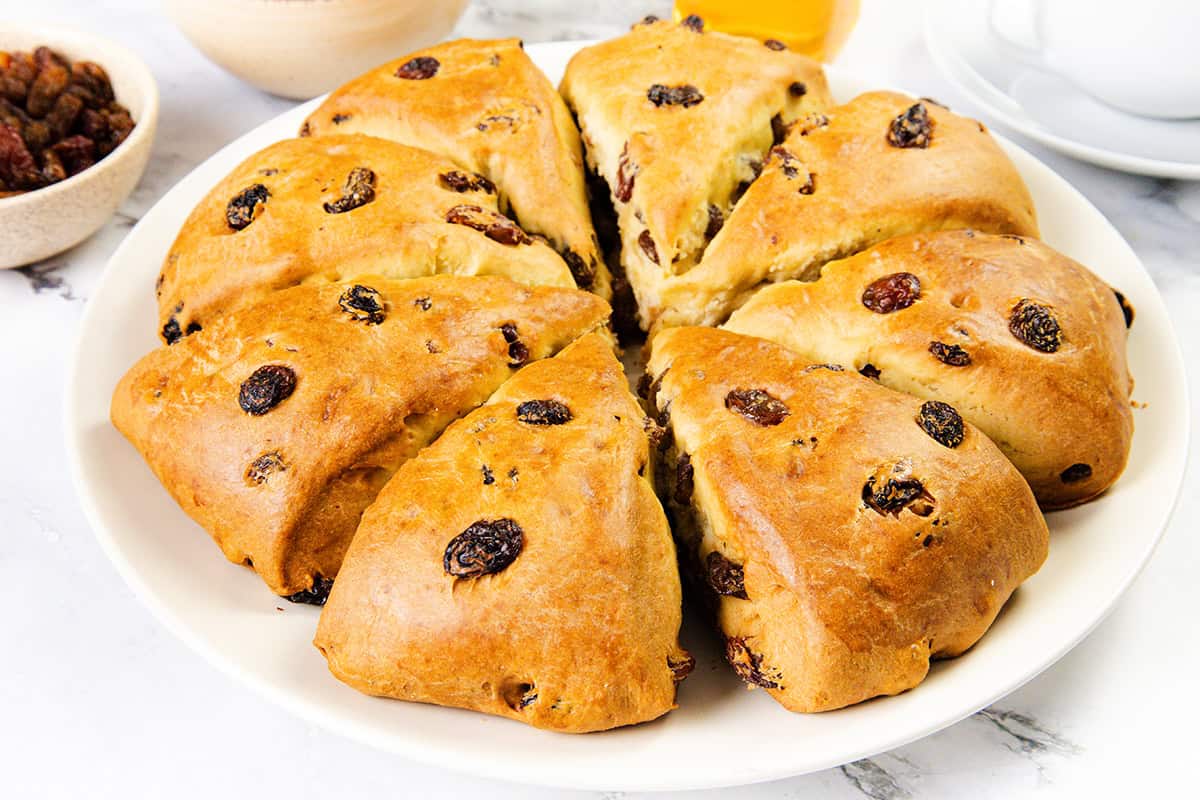
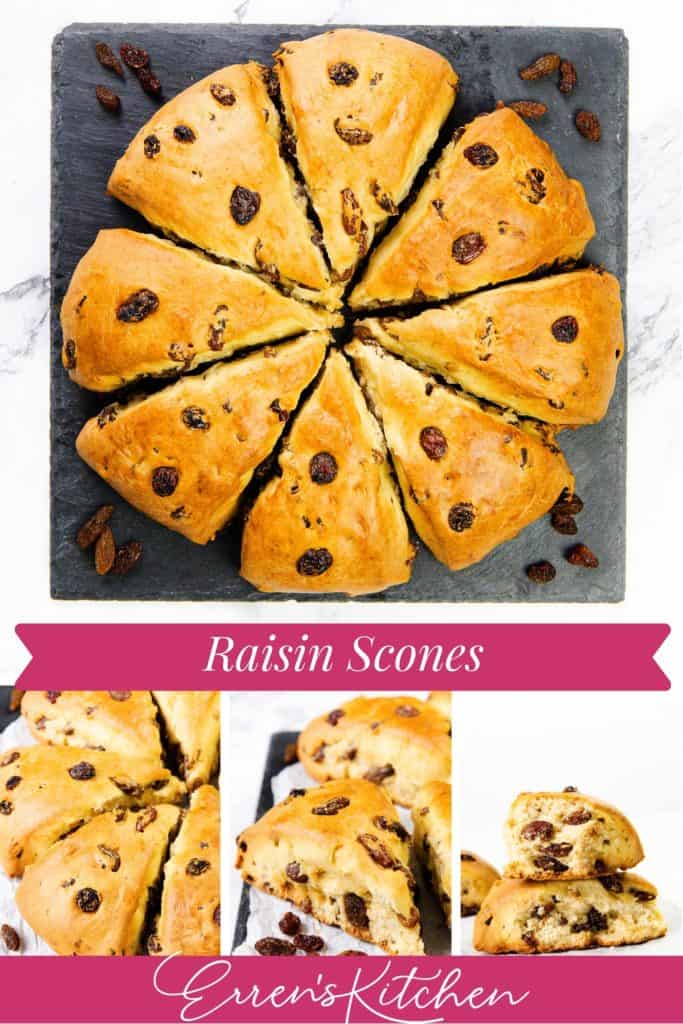
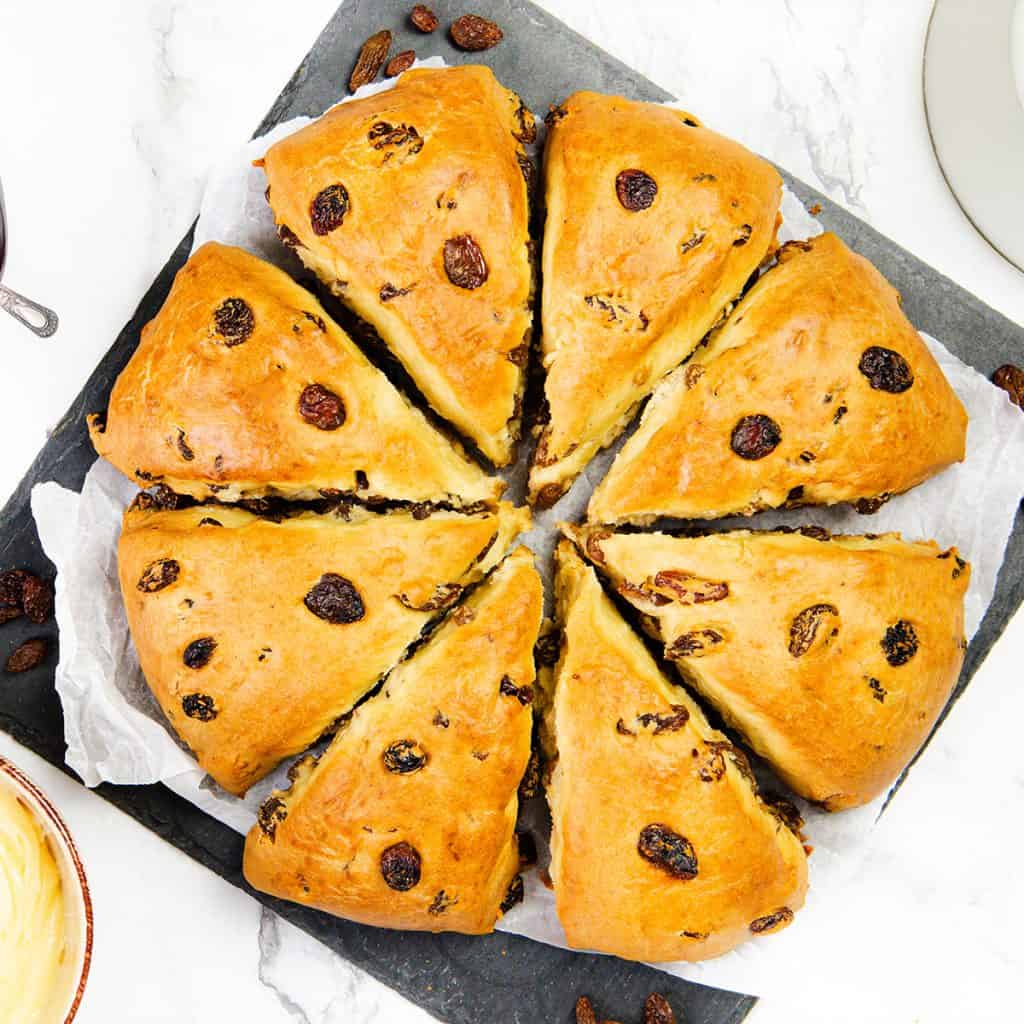
These soft, golden raisin scones are perfect for breakfast or afternoon tea—simple to make, lightly sweet, and baked to fluffy perfection.
in this article:
- Know Before You Scroll
- Perfect British Scones
- Ingredient Notes
- Important Tip for International Bakers
- Step By Step Instructions
- More Scones
- Raisin Scones
- Erren’s Top Tips
- Variations & Add-Ins
- Storage & Freezing Instructions
- FAQs
Know Before You Scroll

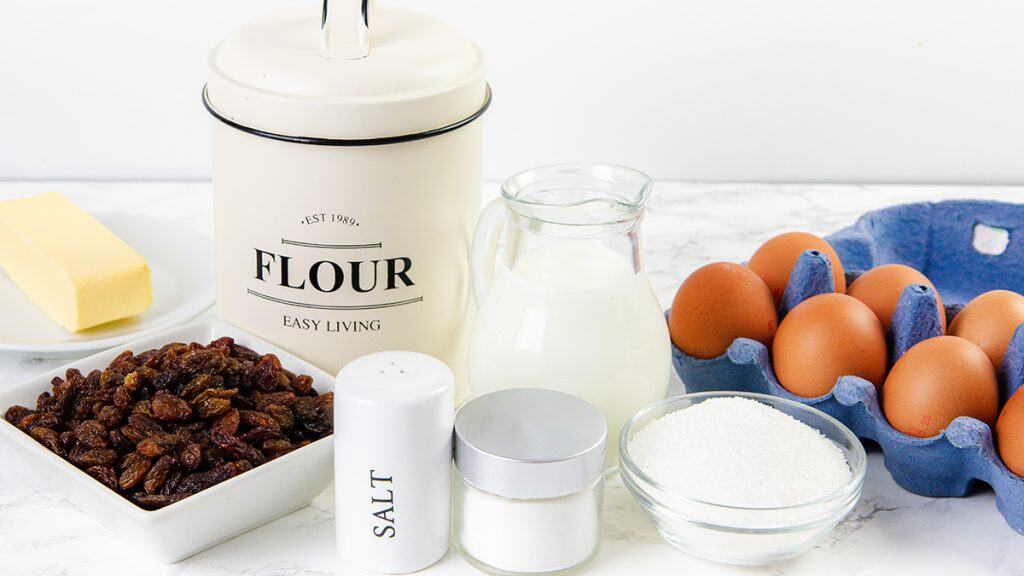
What You’ll Need
All-purpose flour, granulated sugar, baking powder, salt, butter, cream or milk, eggs, raisins, extra cream or milk for brushing.
Flavor Profile
Lightly sweet, buttery, and tender with chewy pops of raisins in every bite—classic cozy bakery vibes.
Difficulty Level
Beginner-friendly. A little mixing, a quick knead, and into the oven they go.
Equipment Needed
Mixing bowls, whisk, spatula, measuring cups and spoons, parchment paper, rolling pin, baking sheet, knife.
Top Tip
Don’t overwork the dough—just knead until it’s smooth. Over-kneading makes tough scones.
Make Ahead
Mix and shape the dough, then chill it overnight. Bake fresh in the morning for warm scones on demand.
Ingredient Swaps
No raisins? Try dried cranberries, chopped dates, or even chocolate chips.
Perfect British Scones
I lived in England for more than 15 years, and during that time I learned how to make authentic British scones in a class at a local cooking school. When I first posted these raisin scones back in 2016, they quickly became a reader favorite—soft, buttery, and perfectly studded with sweet raisins—and they’ve since been shared nearly 10,000 times on social media. The recipe itself hasn’t changed one bit, because it’s already the classic scone I keep coming back to. What has changed is the post itself. The original photos weren’t bright enough to do them justice, and the instructions didn’t include all the little tips I’ve learned along the way. So I’ve refreshed this post with bright new photos, a step-by-step video, and more helpful content to make sure every batch you bake turns out bakery-perfect.
Ingredient Notes
Dry Ingredients
Best Choice
Stick with unbleached all-purpose for structure, table salt for even seasoning, white granulated sugar for balanced sweetness, and baking powder that’s less than 6 months old for the best rise.
Substitutions
In the UK, use plain flour and caster sugar. Fine sea salt works in place of table salt. If you only have self-rising flour, you can omit the salt and baking powder.
Butter
Best Choice
Unsalted butter, very cold and cut into cubes so it blends into the flour in crumbly bits.
Substitutions
Salted butter (reduce the added salt slightly). Plant-based butter works for a dairy-free option.
Wet Ingredients
Best Choice
Large eggs at room temperature for easy mixing, Half-and-half or heavy cream makes the richest, most tender scones.
Substitutions
Double cream in the UK, Whole milk also works fine but makes them a little less rich. Non-dairy milk can be used, though texture may differ.
Raisins
Best Choice
Regular seedless raisins, sultanas, or golden raisins for a brighter flavor twist.
Substitutions
Dried cranberries, chopped dates, or chocolate chips.
Where to Find
Baking aisle or snack aisle, sometimes near trail mix.
Important Tip for International Bakers
One thing I learned from living in both the US and the UK is that ingredients aren’t the same everywhere—especially butter and flour. The texture, fat content, and even protein levels can be different, which means a recipe written for one country doesn’t always turn out the same in another. That’s why if you’re outside the US or Canada, I recommend using the metric version of this recipe (click the “metric” button above the ingredient list). It’s not just a simple conversion—it’s a version I developed while living in the UK, tested with European ingredients, so your scones will bake up just right.
You can find the full, printable recipe at the top of this post , but you can read the detailed instructions with photos for each step below.
Step By Step Instructions
1
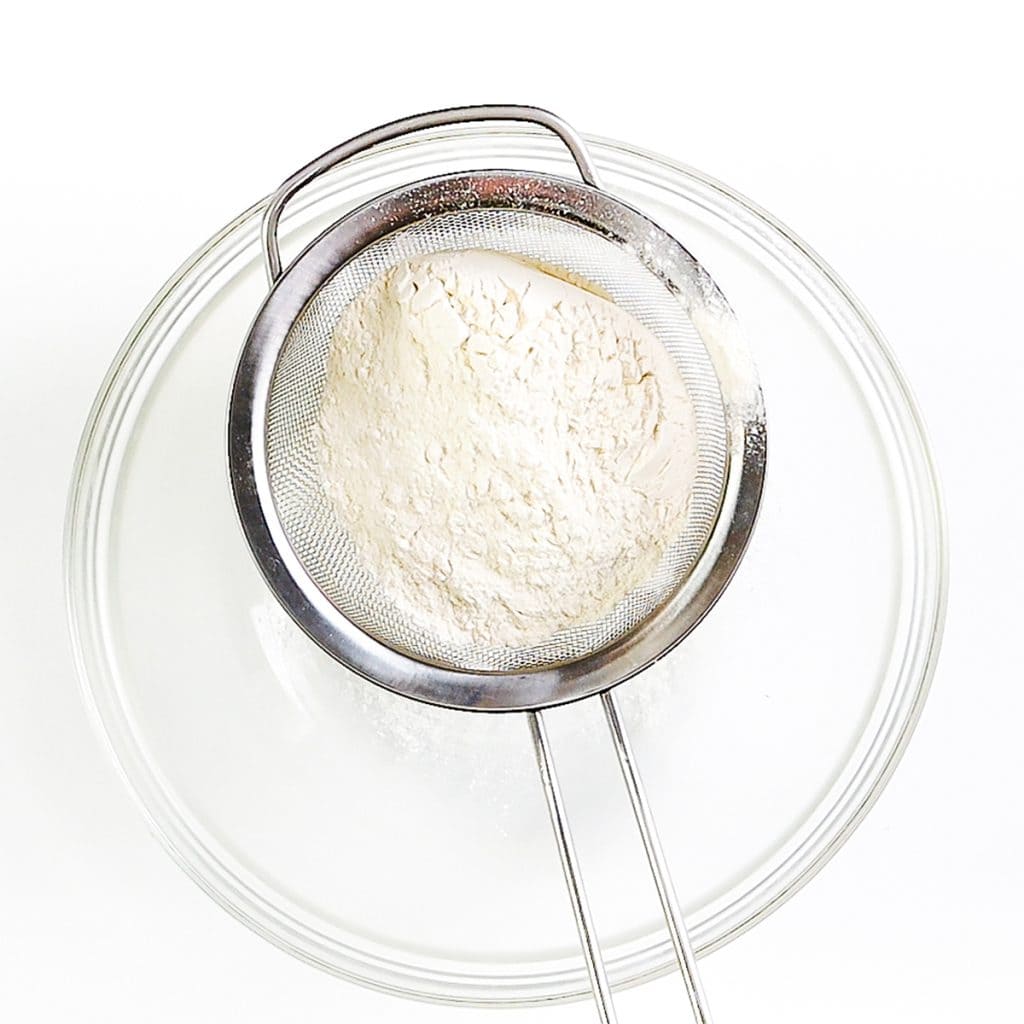
Preheat and Mix the Dry Ingredients
Preheat your oven to 375°F/190°C. In a large bowl, sift together flour, sugar, baking powder, and salt. This gives us a light, even base for the scones.
2
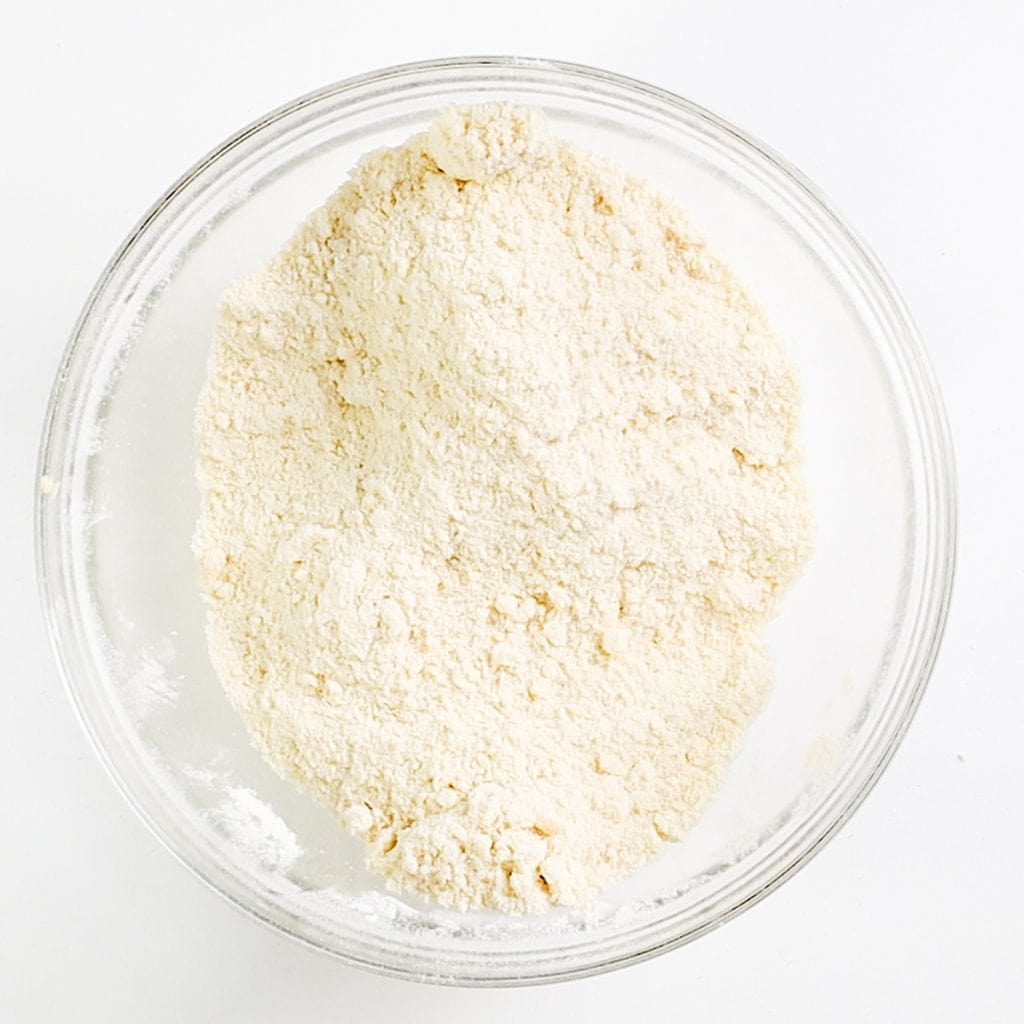
Work in the Butter
Add cold, cubed butter to the bowl. Toss to coat, then rub it into the flour with your fingertips until the mixture looks like big, buttery crumbs. This is what makes the scones flaky.
3
Add the Raisins
Stir in the raisins so they’re evenly distributed—every bite should get a little pop of sweetness.

4
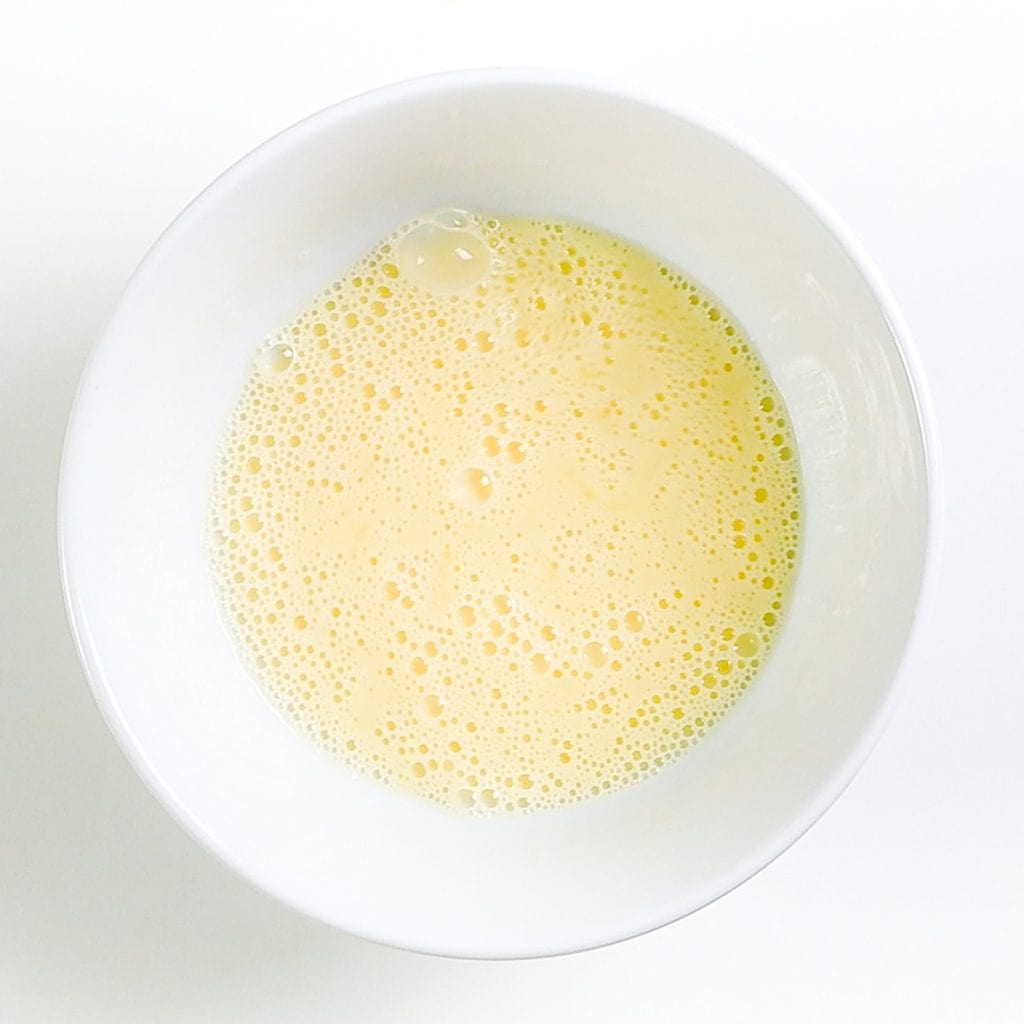
Whisk the Wet Ingredients
In a separate bowl, whisk together the cream and eggs until smooth and well blended.
5
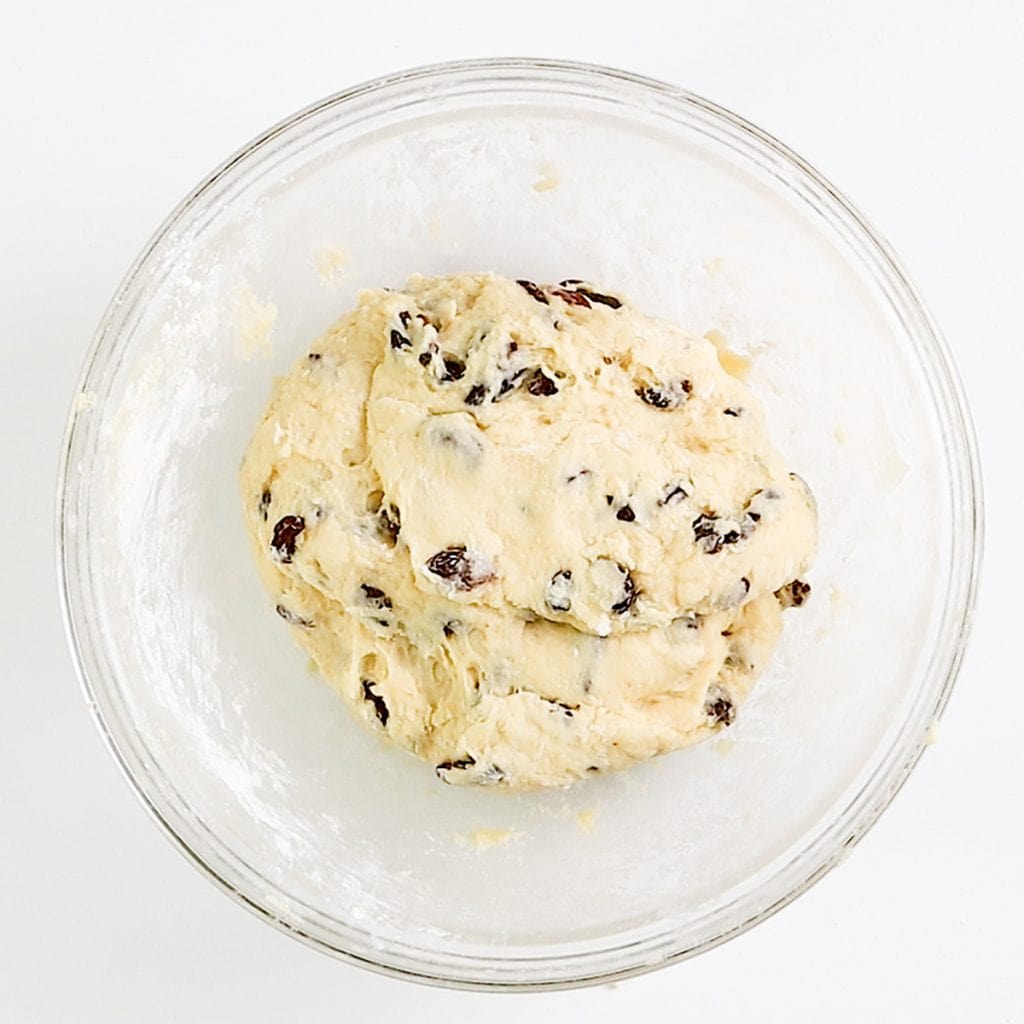
Bring the Dough Together
Pour the wet mixture into the dry mixture and gently stir until it just comes together. If it feels too sticky, sprinkle in a little more flour. Too dry? Add a splash more cream.
6
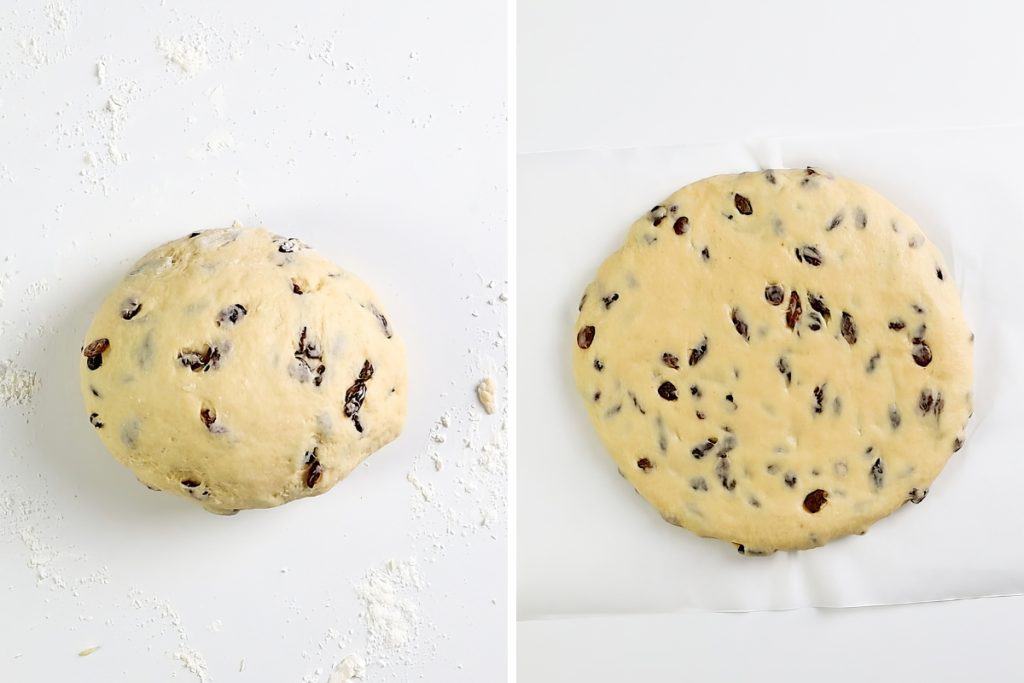
Knead & Shape
Turn the dough onto a lightly floured surface. With floured hands, knead about 25 to 30 times until it’s smooth and soft—don’t overdo it!
Place the dough on lightly floured parchment paper. Press it into a disk, then roll it into a 9-inch circle about 1 inch thick.
7
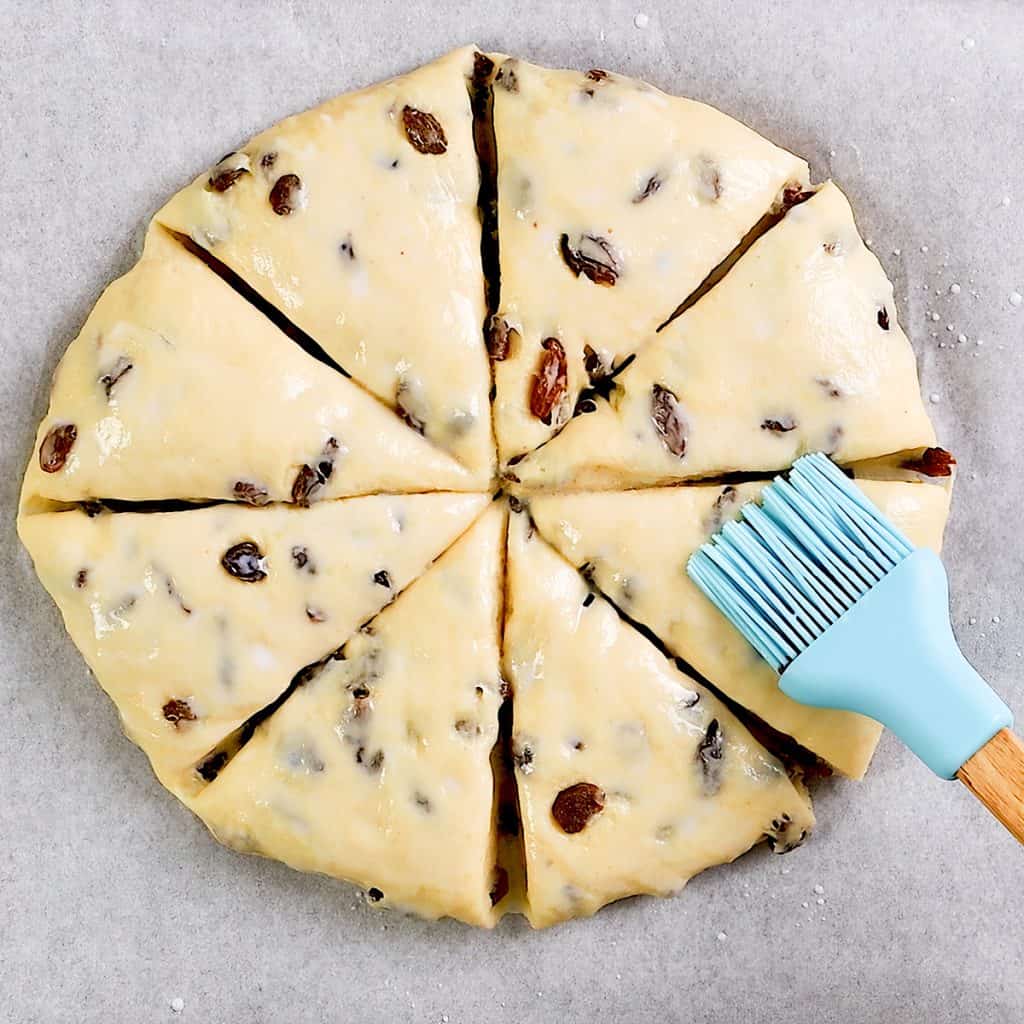
Cut & Brush
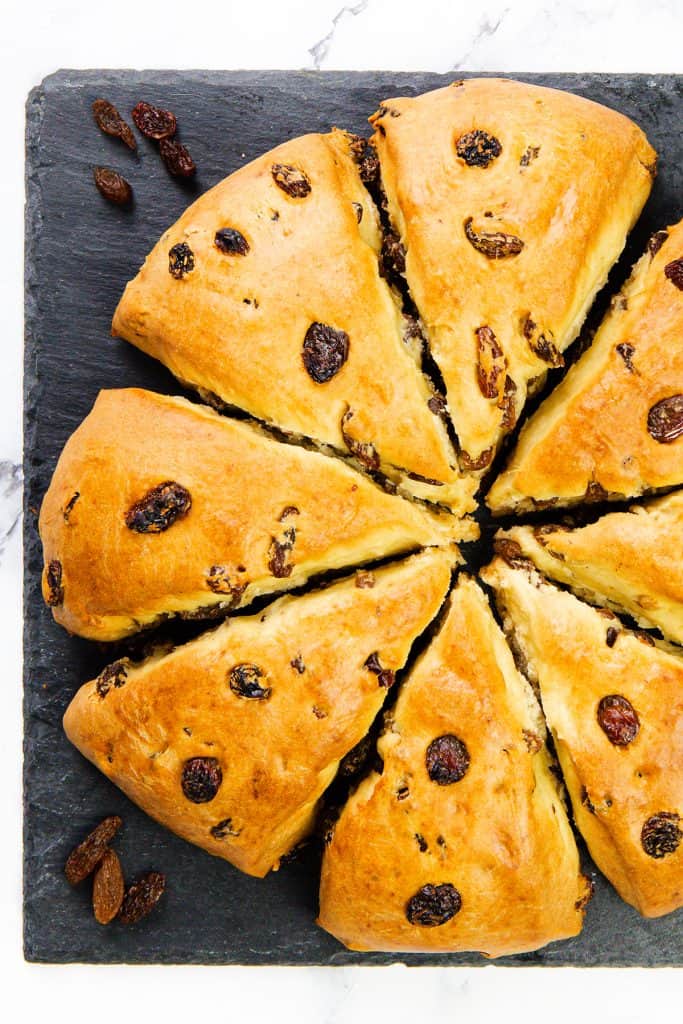
Now I cut the round into eight equal wedges, kind of like slicing a pizza. A quick brush of milk or cream on top gives these scones that gorgeous golden finish.
8
Bake
And finally, bake them for 20 to 25 minutes, until they’re puffed and beautifully golden brown.
9
Serve & Enjoy
That’s it — warm, buttery, raisin scones fresh from the oven. Perfect with a little butter or jam and a hot cup of tea.
More Scones
- Iced Raspberry Scones
- How to Make Scones
- Lemon Blueberry Scones

Ingredients
- ▢ 3 cups all-purpose flour ( See notes if outside the US )
- ▢ ½ cup granulated sugar
- ▢ 1 tablespoon baking powder
- ▢ ½ teaspoon salt
- ▢ 8 tablespoons butter (cut into small cubes)
- ▢ 1 cup half and half (whipping cream or milk, plus 1 to 2 tablespoons extra for brushing)
- ▢ 2 eggs
- ▢ 1 cup raisins
Instructions
- Preheat the oven to 375°F.
- Sift together the flour, sugar, baking powder, and salt in a large bowl.
- Add the cubed butter to the flour mixture. Toss to coat, then rub the butter between your palms or fingertips until the mixture looks like large crumbs. Stir in the raisins.
- In a separate bowl, whisk together the cream (or milk) and eggs.
- Pour the egg mixture into the flour mixture. Stir gently to bring the dough together. If it feels too sticky, add a little more flour. If it feels too dry, add a splash more cream.
- Turn the dough onto a lightly floured surface. With floured hands, knead 25–30 times until the dough is smooth.
- Place a sheet of parchment paper (cut to fit your baking sheet) on your work surface and lightly flour it. Transfer the dough onto the paper and press it into a disk. Using a floured rolling pin, roll it into a 9-inch round, about 1 inch thick.
- Transfer the parchment and dough to a baking sheet. Cut the dough into 8 equal wedges.
- Brush the tops lightly with milk or cream.
- Bake for 20–25 minutes, or until golden brown.
Tips
Erren’s Top Tips
- Keep the butter cold: Cold butter is the secret to flaky scones. I like to cube mine, pop it in the freezer for 10 minutes, and then mix it in.
- Don’t overwork the dough: Kneading too much makes tough scones. Just bring it together until smooth, and then stop.
- Flour your tools: Lightly flouring your hands, rolling pin, and knife helps keep the dough from sticking.
- Use parchment paper: Rolling and shaping the dough right on the parchment makes it easy to transfer to the baking sheet.
- Brush for shine: A quick swipe of milk or cream gives that bakery-style golden finish.
- Check for doneness: The tops should be golden and the bottoms just lightly browned. If you’re unsure, tap the bottom — it should sound hollow.
Variations & Add-Ins
- Citrus zest: Add a teaspoon of orange or lemon zest for a bright flavor twist.
- Spiced scones: A teaspoon of cinnamon or pumpkin pie spice mixed into the dry ingredients brings cozy fall vibes.
- Nutty crunch: Stir in half a cup of chopped walnuts or pecans with the raisins.
- Glazed finish: Drizzle with a simple powdered sugar glaze once they’ve cooled.
- Berry swap: Try dried cranberries, cherries, or chopped apricots instead of raisins.
Storage & Freezing Instructions
- Room temperature: Store cooled scones in an airtight container at room temperature for up to 3 days. They’ll stay soft if you wrap them in a clean kitchen towel inside the container.
- Refrigerator: For a little longer life, refrigerate in a sealed container for up to 5 days. Warm gently in the microwave before serving.
- Freezing baked scones: Wrap each cooled scone individually in plastic wrap and place in a freezer bag. They freeze well for up to 2 months. To serve, thaw at room temperature and reheat in a 300°F oven for 8–10 minutes.
- Freezing unbaked dough: You can also freeze the wedges before baking. Place on a tray until solid, then store in a freezer bag. Bake straight from frozen, adding 2–3 minutes to the bake time.
Nutrition
Do I need to soak the raisins first?
It’s optional! If you like plumper raisins, soak them in warm water (or even a splash of rum) for 10 minutes, then pat dry before mixing in.
Why are my scones spreading too much?
This usually happens if the butter gets too warm or if the dough is too wet. Make sure your butter is cold, and don’t skip chilling the dough briefly if your kitchen is warm.
How do I get my scones fluffier?
The key is not overmixing. Gently fold everything together and let the oven’s heat do the puffing magic.

Raisin Scones
Ingredients
- 3 cups all-purpose flour See notes if outside the US
- ½ cup granulated sugar
- 1 tablespoon baking powder
- ½ teaspoon salt
- 8 tablespoons butter cut into small cubes
- 1 cup half and half whipping cream or milk, plus 1 to 2 tablespoons extra for brushing
- 2 eggs
- 1 cup raisins
Instructions
- Preheat the oven to 375°F.
- Sift together the flour, sugar, baking powder, and salt in a large bowl.
- Add the cubed butter to the flour mixture. Toss to coat, then rub the butter between your palms or fingertips until the mixture looks like large crumbs. Stir in the raisins.
- In a separate bowl, whisk together the cream (or milk) and eggs.
- Pour the egg mixture into the flour mixture. Stir gently to bring the dough together. If it feels too sticky, add a little more flour. If it feels too dry, add a splash more cream.
- Turn the dough onto a lightly floured surface. With floured hands, knead 25–30 times until the dough is smooth.
- Place a sheet of parchment paper (cut to fit your baking sheet) on your work surface and lightly flour it. Transfer the dough onto the paper and press it into a disk. Using a floured rolling pin, roll it into a 9-inch round, about 1 inch thick.
- Transfer the parchment and dough to a baking sheet. Cut the dough into 8 equal wedges.
- Brush the tops lightly with milk or cream.
- Bake for 20–25 minutes, or until golden brown.
Video
Notes
Erren’s Top Tips
- Keep the butter cold: Cold butter is the secret to flaky scones. I like to cube mine, pop it in the freezer for 10 minutes, and then mix it in.
- Don’t overwork the dough: Kneading too much makes tough scones. Just bring it together until smooth, and then stop.
- Flour your tools: Lightly flouring your hands, rolling pin, and knife helps keep the dough from sticking.
- Use parchment paper: Rolling and shaping the dough right on the parchment makes it easy to transfer to the baking sheet.
- Brush for shine: A quick swipe of milk or cream gives that bakery-style golden finish.
- Check for doneness: The tops should be golden and the bottoms just lightly browned. If you’re unsure, tap the bottom — it should sound hollow.
Variations & Add-Ins
- Citrus zest: Add a teaspoon of orange or lemon zest for a bright flavor twist.
- Spiced scones: A teaspoon of cinnamon or pumpkin pie spice mixed into the dry ingredients brings cozy fall vibes.
- Nutty crunch: Stir in half a cup of chopped walnuts or pecans with the raisins.
- Glazed finish: Drizzle with a simple powdered sugar glaze once they’ve cooled.
- Berry swap: Try dried cranberries, cherries, or chopped apricots instead of raisins.
Storage & Freezing Instructions
- Room temperature: Store cooled scones in an airtight container at room temperature for up to 3 days. They’ll stay soft if you wrap them in a clean kitchen towel inside the container.
- Refrigerator: For a little longer life, refrigerate in a sealed container for up to 5 days. Warm gently in the microwave before serving.
- Freezing baked scones: Wrap each cooled scone individually in plastic wrap and place in a freezer bag. They freeze well for up to 2 months. To serve, thaw at room temperature and reheat in a 300°F oven for 8–10 minutes.
- Freezing unbaked dough: You can also freeze the wedges before baking. Place on a tray until solid, then store in a freezer bag. Bake straight from frozen, adding 2–3 minutes to the bake time.
Nutrition
Thank you for visiting Erren’s Kitchen!
<img loading=“lazy” src=“https://www.errenskitchen.com/wp-content/uploads/2016/12/Raisin-Scones-4-683x1024.jpg" onerror=“this.onerror=null;this.src=‘https://blogger.googleusercontent.com/img/a/AVvXsEhe7F7TRXHtjiKvHb5vS7DmnxvpHiDyoYyYvm1nHB3Qp2_w3BnM6A2eq4v7FYxCC9bfZt3a9vIMtAYEKUiaDQbHMg-ViyGmRIj39MLp0bGFfgfYw1Dc9q_H-T0wiTm3l0Uq42dETrN9eC8aGJ9_IORZsxST1AcLR7np1koOfcc7tnHa4S8Mwz_xD9d0=s16000';" alt=“Three golden-brown Raisin Scones are stacked and shown up close, highlighting their fluffy texture and studded raisins. Text overlay reads “Homemade Raisin Scones” and “Erren’s Kitchen. - 26”>
<img loading=“lazy” src=“https://www.errenskitchen.com/wp-content/uploads/2016/12/Raisin-Scones-3-683x1024.jpg" onerror=“this.onerror=null;this.src=‘https://blogger.googleusercontent.com/img/a/AVvXsEhe7F7TRXHtjiKvHb5vS7DmnxvpHiDyoYyYvm1nHB3Qp2_w3BnM6A2eq4v7FYxCC9bfZt3a9vIMtAYEKUiaDQbHMg-ViyGmRIj39MLp0bGFfgfYw1Dc9q_H-T0wiTm3l0Uq42dETrN9eC8aGJ9_IORZsxST1AcLR7np1koOfcc7tnHa4S8Mwz_xD9d0=s16000';" alt=“Two golden brown Raisin Scones, packed with plump raisins, are displayed on a parchment-lined tray. The image features the Erren’s Kitchen logo and website with the text “Homemade Raisin Scones. - 29”>
<img loading=“lazy” src=“https://www.errenskitchen.com/wp-content/uploads/2016/12/Raisin-Scones-3-683x1024.jpg" onerror=“this.onerror=null;this.src=‘https://blogger.googleusercontent.com/img/a/AVvXsEhe7F7TRXHtjiKvHb5vS7DmnxvpHiDyoYyYvm1nHB3Qp2_w3BnM6A2eq4v7FYxCC9bfZt3a9vIMtAYEKUiaDQbHMg-ViyGmRIj39MLp0bGFfgfYw1Dc9q_H-T0wiTm3l0Uq42dETrN9eC8aGJ9_IORZsxST1AcLR7np1koOfcc7tnHa4S8Mwz_xD9d0=s16000';" alt=“Two golden brown Raisin Scones, packed with plump raisins, are displayed on a parchment-lined tray. The image features the Erren’s Kitchen logo and website with the text “Homemade Raisin Scones. - 33”>
These soft, golden raisin scones are perfect for breakfast or afternoon tea—simple to make, lightly sweet, and baked to fluffy perfection.
in this article:
- Know Before You Scroll
- Perfect British Scones
- Ingredient Notes
- Important Tip for International Bakers
- Step By Step Instructions
- More Scones
- Raisin Scones
- Erren’s Top Tips
- Variations & Add-Ins
- Storage & Freezing Instructions
- FAQs
Know Before You Scroll
What You’ll Need
All-purpose flour, granulated sugar, baking powder, salt, butter, cream or milk, eggs, raisins, extra cream or milk for brushing.
Flavor Profile
Lightly sweet, buttery, and tender with chewy pops of raisins in every bite—classic cozy bakery vibes.
Difficulty Level
Beginner-friendly. A little mixing, a quick knead, and into the oven they go.
Equipment Needed
Mixing bowls, whisk, spatula, measuring cups and spoons, parchment paper, rolling pin, baking sheet, knife.
Top Tip
Don’t overwork the dough—just knead until it’s smooth. Over-kneading makes tough scones.
Make Ahead
Mix and shape the dough, then chill it overnight. Bake fresh in the morning for warm scones on demand.
Ingredient Swaps
No raisins? Try dried cranberries, chopped dates, or even chocolate chips.
Perfect British Scones
I lived in England for more than 15 years, and during that time I learned how to make authentic British scones in a class at a local cooking school. When I first posted these raisin scones back in 2016, they quickly became a reader favorite—soft, buttery, and perfectly studded with sweet raisins—and they’ve since been shared nearly 10,000 times on social media. The recipe itself hasn’t changed one bit, because it’s already the classic scone I keep coming back to. What has changed is the post itself. The original photos weren’t bright enough to do them justice, and the instructions didn’t include all the little tips I’ve learned along the way. So I’ve refreshed this post with bright new photos, a step-by-step video, and more helpful content to make sure every batch you bake turns out bakery-perfect.
Ingredient Notes
Dry Ingredients
Best Choice
Stick with unbleached all-purpose for structure, table salt for even seasoning, white granulated sugar for balanced sweetness, and baking powder that’s less than 6 months old for the best rise.
Substitutions
In the UK, use plain flour and caster sugar. Fine sea salt works in place of table salt. If you only have self-rising flour, you can omit the salt and baking powder.
Butter
Best Choice
Unsalted butter, very cold and cut into cubes so it blends into the flour in crumbly bits.
Substitutions
Salted butter (reduce the added salt slightly). Plant-based butter works for a dairy-free option.
Wet Ingredients
Best Choice
Large eggs at room temperature for easy mixing, Half-and-half or heavy cream makes the richest, most tender scones.
Substitutions
Double cream in the UK, Whole milk also works fine but makes them a little less rich. Non-dairy milk can be used, though texture may differ.
Raisins
Best Choice
Regular seedless raisins, sultanas, or golden raisins for a brighter flavor twist.
Substitutions
Dried cranberries, chopped dates, or chocolate chips.
Where to Find
Baking aisle or snack aisle, sometimes near trail mix.
Important Tip for International Bakers
One thing I learned from living in both the US and the UK is that ingredients aren’t the same everywhere—especially butter and flour. The texture, fat content, and even protein levels can be different, which means a recipe written for one country doesn’t always turn out the same in another. That’s why if you’re outside the US or Canada, I recommend using the metric version of this recipe (click the “metric” button above the ingredient list). It’s not just a simple conversion—it’s a version I developed while living in the UK, tested with European ingredients, so your scones will bake up just right.
You can find the full, printable recipe at the top of this post , but you can read the detailed instructions with photos for each step below.
Step By Step Instructions
1
Preheat and Mix the Dry Ingredients
Preheat your oven to 375°F/190°C. In a large bowl, sift together flour, sugar, baking powder, and salt. This gives us a light, even base for the scones.
2
Work in the Butter
Add cold, cubed butter to the bowl. Toss to coat, then rub it into the flour with your fingertips until the mixture looks like big, buttery crumbs. This is what makes the scones flaky.
3
Add the Raisins
Stir in the raisins so they’re evenly distributed—every bite should get a little pop of sweetness.
4
Whisk the Wet Ingredients
In a separate bowl, whisk together the cream and eggs until smooth and well blended.
5
Bring the Dough Together
Pour the wet mixture into the dry mixture and gently stir until it just comes together. If it feels too sticky, sprinkle in a little more flour. Too dry? Add a splash more cream.
6
Knead & Shape
Turn the dough onto a lightly floured surface. With floured hands, knead about 25 to 30 times until it’s smooth and soft—don’t overdo it!
Place the dough on lightly floured parchment paper. Press it into a disk, then roll it into a 9-inch circle about 1 inch thick.
7
Cut & Brush
Now I cut the round into eight equal wedges, kind of like slicing a pizza. A quick brush of milk or cream on top gives these scones that gorgeous golden finish.
8
Bake
And finally, bake them for 20 to 25 minutes, until they’re puffed and beautifully golden brown.
9
Serve & Enjoy
That’s it — warm, buttery, raisin scones fresh from the oven. Perfect with a little butter or jam and a hot cup of tea.
More Scones
- Iced Raspberry Scones
- How to Make Scones
- Lemon Blueberry Scones
Ingredients
- ▢ 3 cups all-purpose flour ( See notes if outside the US )
- ▢ ½ cup granulated sugar
- ▢ 1 tablespoon baking powder
- ▢ ½ teaspoon salt
- ▢ 8 tablespoons butter (cut into small cubes)
- ▢ 1 cup half and half (whipping cream or milk, plus 1 to 2 tablespoons extra for brushing)
- ▢ 2 eggs
- ▢ 1 cup raisins
Instructions
- Preheat the oven to 375°F.
- Sift together the flour, sugar, baking powder, and salt in a large bowl.
- Add the cubed butter to the flour mixture. Toss to coat, then rub the butter between your palms or fingertips until the mixture looks like large crumbs. Stir in the raisins.
- In a separate bowl, whisk together the cream (or milk) and eggs.
- Pour the egg mixture into the flour mixture. Stir gently to bring the dough together. If it feels too sticky, add a little more flour. If it feels too dry, add a splash more cream.
- Turn the dough onto a lightly floured surface. With floured hands, knead 25–30 times until the dough is smooth.
- Place a sheet of parchment paper (cut to fit your baking sheet) on your work surface and lightly flour it. Transfer the dough onto the paper and press it into a disk. Using a floured rolling pin, roll it into a 9-inch round, about 1 inch thick.
- Transfer the parchment and dough to a baking sheet. Cut the dough into 8 equal wedges.
- Brush the tops lightly with milk or cream.
- Bake for 20–25 minutes, or until golden brown.
Tips
Erren’s Top Tips
- Keep the butter cold: Cold butter is the secret to flaky scones. I like to cube mine, pop it in the freezer for 10 minutes, and then mix it in.
- Don’t overwork the dough: Kneading too much makes tough scones. Just bring it together until smooth, and then stop.
- Flour your tools: Lightly flouring your hands, rolling pin, and knife helps keep the dough from sticking.
- Use parchment paper: Rolling and shaping the dough right on the parchment makes it easy to transfer to the baking sheet.
- Brush for shine: A quick swipe of milk or cream gives that bakery-style golden finish.
- Check for doneness: The tops should be golden and the bottoms just lightly browned. If you’re unsure, tap the bottom — it should sound hollow.
Variations & Add-Ins
- Citrus zest: Add a teaspoon of orange or lemon zest for a bright flavor twist.
- Spiced scones: A teaspoon of cinnamon or pumpkin pie spice mixed into the dry ingredients brings cozy fall vibes.
- Nutty crunch: Stir in half a cup of chopped walnuts or pecans with the raisins.
- Glazed finish: Drizzle with a simple powdered sugar glaze once they’ve cooled.
- Berry swap: Try dried cranberries, cherries, or chopped apricots instead of raisins.
Storage & Freezing Instructions
- Room temperature: Store cooled scones in an airtight container at room temperature for up to 3 days. They’ll stay soft if you wrap them in a clean kitchen towel inside the container.
- Refrigerator: For a little longer life, refrigerate in a sealed container for up to 5 days. Warm gently in the microwave before serving.
- Freezing baked scones: Wrap each cooled scone individually in plastic wrap and place in a freezer bag. They freeze well for up to 2 months. To serve, thaw at room temperature and reheat in a 300°F oven for 8–10 minutes.
- Freezing unbaked dough: You can also freeze the wedges before baking. Place on a tray until solid, then store in a freezer bag. Bake straight from frozen, adding 2–3 minutes to the bake time.
Nutrition
Do I need to soak the raisins first?
It’s optional! If you like plumper raisins, soak them in warm water (or even a splash of rum) for 10 minutes, then pat dry before mixing in.
Why are my scones spreading too much?
This usually happens if the butter gets too warm or if the dough is too wet. Make sure your butter is cold, and don’t skip chilling the dough briefly if your kitchen is warm.
How do I get my scones fluffier?
The key is not overmixing. Gently fold everything together and let the oven’s heat do the puffing magic.
<img loading=“lazy” src=“https://www.errenskitchen.com/wp-content/uploads/2016/12/Raisin-Scones-4-683x1024.jpg" onerror=“this.onerror=null;this.src=‘https://blogger.googleusercontent.com/img/a/AVvXsEhe7F7TRXHtjiKvHb5vS7DmnxvpHiDyoYyYvm1nHB3Qp2_w3BnM6A2eq4v7FYxCC9bfZt3a9vIMtAYEKUiaDQbHMg-ViyGmRIj39MLp0bGFfgfYw1Dc9q_H-T0wiTm3l0Uq42dETrN9eC8aGJ9_IORZsxST1AcLR7np1koOfcc7tnHa4S8Mwz_xD9d0=s16000';" alt=“Three golden-brown Raisin Scones are stacked and shown up close, highlighting their fluffy texture and studded raisins. Text overlay reads “Homemade Raisin Scones” and “Erren’s Kitchen. - 50”>
<img loading=“lazy” src=“https://www.errenskitchen.com/wp-content/uploads/2016/12/Raisin-Scones-3-683x1024.jpg" onerror=“this.onerror=null;this.src=‘https://blogger.googleusercontent.com/img/a/AVvXsEhe7F7TRXHtjiKvHb5vS7DmnxvpHiDyoYyYvm1nHB3Qp2_w3BnM6A2eq4v7FYxCC9bfZt3a9vIMtAYEKUiaDQbHMg-ViyGmRIj39MLp0bGFfgfYw1Dc9q_H-T0wiTm3l0Uq42dETrN9eC8aGJ9_IORZsxST1AcLR7np1koOfcc7tnHa4S8Mwz_xD9d0=s16000';" alt=“Two golden brown Raisin Scones, packed with plump raisins, are displayed on a parchment-lined tray. The image features the Erren’s Kitchen logo and website with the text “Homemade Raisin Scones. - 53”>
<img loading=“lazy” src=“https://www.errenskitchen.com/wp-content/uploads/2016/12/Raisin-Scones-3-683x1024.jpg" onerror=“this.onerror=null;this.src=‘https://blogger.googleusercontent.com/img/a/AVvXsEhe7F7TRXHtjiKvHb5vS7DmnxvpHiDyoYyYvm1nHB3Qp2_w3BnM6A2eq4v7FYxCC9bfZt3a9vIMtAYEKUiaDQbHMg-ViyGmRIj39MLp0bGFfgfYw1Dc9q_H-T0wiTm3l0Uq42dETrN9eC8aGJ9_IORZsxST1AcLR7np1koOfcc7tnHa4S8Mwz_xD9d0=s16000';" alt=“Two golden brown Raisin Scones, packed with plump raisins, are displayed on a parchment-lined tray. The image features the Erren’s Kitchen logo and website with the text “Homemade Raisin Scones. - 57”>
These soft, golden raisin scones are perfect for breakfast or afternoon tea—simple to make, lightly sweet, and baked to fluffy perfection.
in this article:
- Know Before You Scroll
- Perfect British Scones
- Ingredient Notes
- Important Tip for International Bakers
- Step By Step Instructions
- More Scones
- Raisin Scones
- Erren’s Top Tips
- Variations & Add-Ins
- Storage & Freezing Instructions
- FAQs
Know Before You Scroll
What You’ll Need
All-purpose flour, granulated sugar, baking powder, salt, butter, cream or milk, eggs, raisins, extra cream or milk for brushing.
Flavor Profile
Lightly sweet, buttery, and tender with chewy pops of raisins in every bite—classic cozy bakery vibes.
Difficulty Level
Beginner-friendly. A little mixing, a quick knead, and into the oven they go.
Equipment Needed
Mixing bowls, whisk, spatula, measuring cups and spoons, parchment paper, rolling pin, baking sheet, knife.
Top Tip
Don’t overwork the dough—just knead until it’s smooth. Over-kneading makes tough scones.
Make Ahead
Mix and shape the dough, then chill it overnight. Bake fresh in the morning for warm scones on demand.
Ingredient Swaps
No raisins? Try dried cranberries, chopped dates, or even chocolate chips.
Perfect British Scones
I lived in England for more than 15 years, and during that time I learned how to make authentic British scones in a class at a local cooking school. When I first posted these raisin scones back in 2016, they quickly became a reader favorite—soft, buttery, and perfectly studded with sweet raisins—and they’ve since been shared nearly 10,000 times on social media. The recipe itself hasn’t changed one bit, because it’s already the classic scone I keep coming back to. What has changed is the post itself. The original photos weren’t bright enough to do them justice, and the instructions didn’t include all the little tips I’ve learned along the way. So I’ve refreshed this post with bright new photos, a step-by-step video, and more helpful content to make sure every batch you bake turns out bakery-perfect.
Ingredient Notes
Dry Ingredients
Best Choice
Stick with unbleached all-purpose for structure, table salt for even seasoning, white granulated sugar for balanced sweetness, and baking powder that’s less than 6 months old for the best rise.
Substitutions
In the UK, use plain flour and caster sugar. Fine sea salt works in place of table salt. If you only have self-rising flour, you can omit the salt and baking powder.
Butter
Best Choice
Unsalted butter, very cold and cut into cubes so it blends into the flour in crumbly bits.
Substitutions
Salted butter (reduce the added salt slightly). Plant-based butter works for a dairy-free option.
Wet Ingredients
Best Choice
Large eggs at room temperature for easy mixing, Half-and-half or heavy cream makes the richest, most tender scones.
Substitutions
Double cream in the UK, Whole milk also works fine but makes them a little less rich. Non-dairy milk can be used, though texture may differ.
Raisins
Best Choice
Regular seedless raisins, sultanas, or golden raisins for a brighter flavor twist.
Substitutions
Dried cranberries, chopped dates, or chocolate chips.
Where to Find
Baking aisle or snack aisle, sometimes near trail mix.
Important Tip for International Bakers
One thing I learned from living in both the US and the UK is that ingredients aren’t the same everywhere—especially butter and flour. The texture, fat content, and even protein levels can be different, which means a recipe written for one country doesn’t always turn out the same in another. That’s why if you’re outside the US or Canada, I recommend using the metric version of this recipe (click the “metric” button above the ingredient list). It’s not just a simple conversion—it’s a version I developed while living in the UK, tested with European ingredients, so your scones will bake up just right.
You can find the full, printable recipe at the top of this post , but you can read the detailed instructions with photos for each step below.
Step By Step Instructions
1
Preheat and Mix the Dry Ingredients
Preheat your oven to 375°F/190°C. In a large bowl, sift together flour, sugar, baking powder, and salt. This gives us a light, even base for the scones.
2
Work in the Butter
Add cold, cubed butter to the bowl. Toss to coat, then rub it into the flour with your fingertips until the mixture looks like big, buttery crumbs. This is what makes the scones flaky.
3
Add the Raisins
Stir in the raisins so they’re evenly distributed—every bite should get a little pop of sweetness.
4
Whisk the Wet Ingredients
In a separate bowl, whisk together the cream and eggs until smooth and well blended.
5
Bring the Dough Together
Pour the wet mixture into the dry mixture and gently stir until it just comes together. If it feels too sticky, sprinkle in a little more flour. Too dry? Add a splash more cream.
6
Knead & Shape
Turn the dough onto a lightly floured surface. With floured hands, knead about 25 to 30 times until it’s smooth and soft—don’t overdo it!
Place the dough on lightly floured parchment paper. Press it into a disk, then roll it into a 9-inch circle about 1 inch thick.
7
Cut & Brush
Now I cut the round into eight equal wedges, kind of like slicing a pizza. A quick brush of milk or cream on top gives these scones that gorgeous golden finish.
8
Bake
And finally, bake them for 20 to 25 minutes, until they’re puffed and beautifully golden brown.
9
Serve & Enjoy
That’s it — warm, buttery, raisin scones fresh from the oven. Perfect with a little butter or jam and a hot cup of tea.
More Scones
- Iced Raspberry Scones
- How to Make Scones
- Lemon Blueberry Scones
Ingredients
- ▢ 3 cups all-purpose flour ( See notes if outside the US )
- ▢ ½ cup granulated sugar
- ▢ 1 tablespoon baking powder
- ▢ ½ teaspoon salt
- ▢ 8 tablespoons butter (cut into small cubes)
- ▢ 1 cup half and half (whipping cream or milk, plus 1 to 2 tablespoons extra for brushing)
- ▢ 2 eggs
- ▢ 1 cup raisins
Instructions
- Preheat the oven to 375°F.
- Sift together the flour, sugar, baking powder, and salt in a large bowl.
- Add the cubed butter to the flour mixture. Toss to coat, then rub the butter between your palms or fingertips until the mixture looks like large crumbs. Stir in the raisins.
- In a separate bowl, whisk together the cream (or milk) and eggs.
- Pour the egg mixture into the flour mixture. Stir gently to bring the dough together. If it feels too sticky, add a little more flour. If it feels too dry, add a splash more cream.
- Turn the dough onto a lightly floured surface. With floured hands, knead 25–30 times until the dough is smooth.
- Place a sheet of parchment paper (cut to fit your baking sheet) on your work surface and lightly flour it. Transfer the dough onto the paper and press it into a disk. Using a floured rolling pin, roll it into a 9-inch round, about 1 inch thick.
- Transfer the parchment and dough to a baking sheet. Cut the dough into 8 equal wedges.
- Brush the tops lightly with milk or cream.
- Bake for 20–25 minutes, or until golden brown.
Tips
Erren’s Top Tips
- Keep the butter cold: Cold butter is the secret to flaky scones. I like to cube mine, pop it in the freezer for 10 minutes, and then mix it in.
- Don’t overwork the dough: Kneading too much makes tough scones. Just bring it together until smooth, and then stop.
- Flour your tools: Lightly flouring your hands, rolling pin, and knife helps keep the dough from sticking.
- Use parchment paper: Rolling and shaping the dough right on the parchment makes it easy to transfer to the baking sheet.
- Brush for shine: A quick swipe of milk or cream gives that bakery-style golden finish.
- Check for doneness: The tops should be golden and the bottoms just lightly browned. If you’re unsure, tap the bottom — it should sound hollow.
Variations & Add-Ins
- Citrus zest: Add a teaspoon of orange or lemon zest for a bright flavor twist.
- Spiced scones: A teaspoon of cinnamon or pumpkin pie spice mixed into the dry ingredients brings cozy fall vibes.
- Nutty crunch: Stir in half a cup of chopped walnuts or pecans with the raisins.
- Glazed finish: Drizzle with a simple powdered sugar glaze once they’ve cooled.
- Berry swap: Try dried cranberries, cherries, or chopped apricots instead of raisins.
Storage & Freezing Instructions
- Room temperature: Store cooled scones in an airtight container at room temperature for up to 3 days. They’ll stay soft if you wrap them in a clean kitchen towel inside the container.
- Refrigerator: For a little longer life, refrigerate in a sealed container for up to 5 days. Warm gently in the microwave before serving.
- Freezing baked scones: Wrap each cooled scone individually in plastic wrap and place in a freezer bag. They freeze well for up to 2 months. To serve, thaw at room temperature and reheat in a 300°F oven for 8–10 minutes.
- Freezing unbaked dough: You can also freeze the wedges before baking. Place on a tray until solid, then store in a freezer bag. Bake straight from frozen, adding 2–3 minutes to the bake time.
Nutrition
Do I need to soak the raisins first?
It’s optional! If you like plumper raisins, soak them in warm water (or even a splash of rum) for 10 minutes, then pat dry before mixing in.
Why are my scones spreading too much?
This usually happens if the butter gets too warm or if the dough is too wet. Make sure your butter is cold, and don’t skip chilling the dough briefly if your kitchen is warm.
How do I get my scones fluffier?
The key is not overmixing. Gently fold everything together and let the oven’s heat do the puffing magic.
<img loading=“lazy” src=“https://www.errenskitchen.com/wp-content/uploads/2016/12/Raisin-Scones-4-683x1024.jpg" onerror=“this.onerror=null;this.src=‘https://blogger.googleusercontent.com/img/a/AVvXsEhe7F7TRXHtjiKvHb5vS7DmnxvpHiDyoYyYvm1nHB3Qp2_w3BnM6A2eq4v7FYxCC9bfZt3a9vIMtAYEKUiaDQbHMg-ViyGmRIj39MLp0bGFfgfYw1Dc9q_H-T0wiTm3l0Uq42dETrN9eC8aGJ9_IORZsxST1AcLR7np1koOfcc7tnHa4S8Mwz_xD9d0=s16000';" alt=“Three golden-brown Raisin Scones are stacked and shown up close, highlighting their fluffy texture and studded raisins. Text overlay reads “Homemade Raisin Scones” and “Erren’s Kitchen. - 74”>
<img loading=“lazy” src=“https://www.errenskitchen.com/wp-content/uploads/2016/12/Raisin-Scones-3-683x1024.jpg" onerror=“this.onerror=null;this.src=‘https://blogger.googleusercontent.com/img/a/AVvXsEhe7F7TRXHtjiKvHb5vS7DmnxvpHiDyoYyYvm1nHB3Qp2_w3BnM6A2eq4v7FYxCC9bfZt3a9vIMtAYEKUiaDQbHMg-ViyGmRIj39MLp0bGFfgfYw1Dc9q_H-T0wiTm3l0Uq42dETrN9eC8aGJ9_IORZsxST1AcLR7np1koOfcc7tnHa4S8Mwz_xD9d0=s16000';" alt=“Two golden brown Raisin Scones, packed with plump raisins, are displayed on a parchment-lined tray. The image features the Erren’s Kitchen logo and website with the text “Homemade Raisin Scones. - 77”>
<img loading=“lazy” src=“https://www.errenskitchen.com/wp-content/uploads/2016/12/Raisin-Scones-3-683x1024.jpg" onerror=“this.onerror=null;this.src=‘https://blogger.googleusercontent.com/img/a/AVvXsEhe7F7TRXHtjiKvHb5vS7DmnxvpHiDyoYyYvm1nHB3Qp2_w3BnM6A2eq4v7FYxCC9bfZt3a9vIMtAYEKUiaDQbHMg-ViyGmRIj39MLp0bGFfgfYw1Dc9q_H-T0wiTm3l0Uq42dETrN9eC8aGJ9_IORZsxST1AcLR7np1koOfcc7tnHa4S8Mwz_xD9d0=s16000';" alt=“Two golden brown Raisin Scones, packed with plump raisins, are displayed on a parchment-lined tray. The image features the Erren’s Kitchen logo and website with the text “Homemade Raisin Scones. - 81”>
These soft, golden raisin scones are perfect for breakfast or afternoon tea—simple to make, lightly sweet, and baked to fluffy perfection.
in this article:
- Know Before You Scroll
- Perfect British Scones
- Ingredient Notes
- Important Tip for International Bakers
- Step By Step Instructions
- More Scones
- Raisin Scones
- Erren’s Top Tips
- Variations & Add-Ins
- Storage & Freezing Instructions
- FAQs
Know Before You Scroll
What You’ll Need
All-purpose flour, granulated sugar, baking powder, salt, butter, cream or milk, eggs, raisins, extra cream or milk for brushing.
Flavor Profile
Lightly sweet, buttery, and tender with chewy pops of raisins in every bite—classic cozy bakery vibes.
Difficulty Level
Beginner-friendly. A little mixing, a quick knead, and into the oven they go.
Equipment Needed
Mixing bowls, whisk, spatula, measuring cups and spoons, parchment paper, rolling pin, baking sheet, knife.
Top Tip
Don’t overwork the dough—just knead until it’s smooth. Over-kneading makes tough scones.
Make Ahead
Mix and shape the dough, then chill it overnight. Bake fresh in the morning for warm scones on demand.
Ingredient Swaps
No raisins? Try dried cranberries, chopped dates, or even chocolate chips.
Perfect British Scones
I lived in England for more than 15 years, and during that time I learned how to make authentic British scones in a class at a local cooking school. When I first posted these raisin scones back in 2016, they quickly became a reader favorite—soft, buttery, and perfectly studded with sweet raisins—and they’ve since been shared nearly 10,000 times on social media. The recipe itself hasn’t changed one bit, because it’s already the classic scone I keep coming back to. What has changed is the post itself. The original photos weren’t bright enough to do them justice, and the instructions didn’t include all the little tips I’ve learned along the way. So I’ve refreshed this post with bright new photos, a step-by-step video, and more helpful content to make sure every batch you bake turns out bakery-perfect.
Ingredient Notes
Dry Ingredients
Best Choice
Stick with unbleached all-purpose for structure, table salt for even seasoning, white granulated sugar for balanced sweetness, and baking powder that’s less than 6 months old for the best rise.
Substitutions
In the UK, use plain flour and caster sugar. Fine sea salt works in place of table salt. If you only have self-rising flour, you can omit the salt and baking powder.
Butter
Best Choice
Unsalted butter, very cold and cut into cubes so it blends into the flour in crumbly bits.
Substitutions
Salted butter (reduce the added salt slightly). Plant-based butter works for a dairy-free option.
Wet Ingredients
Best Choice
Large eggs at room temperature for easy mixing, Half-and-half or heavy cream makes the richest, most tender scones.
Substitutions
Double cream in the UK, Whole milk also works fine but makes them a little less rich. Non-dairy milk can be used, though texture may differ.
Raisins
Best Choice
Regular seedless raisins, sultanas, or golden raisins for a brighter flavor twist.
Substitutions
Dried cranberries, chopped dates, or chocolate chips.
Where to Find
Baking aisle or snack aisle, sometimes near trail mix.
Important Tip for International Bakers
One thing I learned from living in both the US and the UK is that ingredients aren’t the same everywhere—especially butter and flour. The texture, fat content, and even protein levels can be different, which means a recipe written for one country doesn’t always turn out the same in another. That’s why if you’re outside the US or Canada, I recommend using the metric version of this recipe (click the “metric” button above the ingredient list). It’s not just a simple conversion—it’s a version I developed while living in the UK, tested with European ingredients, so your scones will bake up just right.
You can find the full, printable recipe at the top of this post , but you can read the detailed instructions with photos for each step below.
Step By Step Instructions
1
Preheat and Mix the Dry Ingredients
Preheat your oven to 375°F/190°C. In a large bowl, sift together flour, sugar, baking powder, and salt. This gives us a light, even base for the scones.
2
Work in the Butter
Add cold, cubed butter to the bowl. Toss to coat, then rub it into the flour with your fingertips until the mixture looks like big, buttery crumbs. This is what makes the scones flaky.
3
Add the Raisins
Stir in the raisins so they’re evenly distributed—every bite should get a little pop of sweetness.
4
Whisk the Wet Ingredients
In a separate bowl, whisk together the cream and eggs until smooth and well blended.
5
Bring the Dough Together
Pour the wet mixture into the dry mixture and gently stir until it just comes together. If it feels too sticky, sprinkle in a little more flour. Too dry? Add a splash more cream.
6
Knead & Shape
Turn the dough onto a lightly floured surface. With floured hands, knead about 25 to 30 times until it’s smooth and soft—don’t overdo it!
Place the dough on lightly floured parchment paper. Press it into a disk, then roll it into a 9-inch circle about 1 inch thick.
7
Cut & Brush
Now I cut the round into eight equal wedges, kind of like slicing a pizza. A quick brush of milk or cream on top gives these scones that gorgeous golden finish.
8
Bake
And finally, bake them for 20 to 25 minutes, until they’re puffed and beautifully golden brown.
9
Serve & Enjoy
That’s it — warm, buttery, raisin scones fresh from the oven. Perfect with a little butter or jam and a hot cup of tea.
More Scones
- Iced Raspberry Scones
- How to Make Scones
- Lemon Blueberry Scones
Ingredients
- ▢ 3 cups all-purpose flour ( See notes if outside the US )
- ▢ ½ cup granulated sugar
- ▢ 1 tablespoon baking powder
- ▢ ½ teaspoon salt
- ▢ 8 tablespoons butter (cut into small cubes)
- ▢ 1 cup half and half (whipping cream or milk, plus 1 to 2 tablespoons extra for brushing)
- ▢ 2 eggs
- ▢ 1 cup raisins
Instructions
- Preheat the oven to 375°F.
- Sift together the flour, sugar, baking powder, and salt in a large bowl.
- Add the cubed butter to the flour mixture. Toss to coat, then rub the butter between your palms or fingertips until the mixture looks like large crumbs. Stir in the raisins.
- In a separate bowl, whisk together the cream (or milk) and eggs.
- Pour the egg mixture into the flour mixture. Stir gently to bring the dough together. If it feels too sticky, add a little more flour. If it feels too dry, add a splash more cream.
- Turn the dough onto a lightly floured surface. With floured hands, knead 25–30 times until the dough is smooth.
- Place a sheet of parchment paper (cut to fit your baking sheet) on your work surface and lightly flour it. Transfer the dough onto the paper and press it into a disk. Using a floured rolling pin, roll it into a 9-inch round, about 1 inch thick.
- Transfer the parchment and dough to a baking sheet. Cut the dough into 8 equal wedges.
- Brush the tops lightly with milk or cream.
- Bake for 20–25 minutes, or until golden brown.
Tips
Erren’s Top Tips
- Keep the butter cold: Cold butter is the secret to flaky scones. I like to cube mine, pop it in the freezer for 10 minutes, and then mix it in.
- Don’t overwork the dough: Kneading too much makes tough scones. Just bring it together until smooth, and then stop.
- Flour your tools: Lightly flouring your hands, rolling pin, and knife helps keep the dough from sticking.
- Use parchment paper: Rolling and shaping the dough right on the parchment makes it easy to transfer to the baking sheet.
- Brush for shine: A quick swipe of milk or cream gives that bakery-style golden finish.
- Check for doneness: The tops should be golden and the bottoms just lightly browned. If you’re unsure, tap the bottom — it should sound hollow.
Variations & Add-Ins
- Citrus zest: Add a teaspoon of orange or lemon zest for a bright flavor twist.
- Spiced scones: A teaspoon of cinnamon or pumpkin pie spice mixed into the dry ingredients brings cozy fall vibes.
- Nutty crunch: Stir in half a cup of chopped walnuts or pecans with the raisins.
- Glazed finish: Drizzle with a simple powdered sugar glaze once they’ve cooled.
- Berry swap: Try dried cranberries, cherries, or chopped apricots instead of raisins.
Storage & Freezing Instructions
- Room temperature: Store cooled scones in an airtight container at room temperature for up to 3 days. They’ll stay soft if you wrap them in a clean kitchen towel inside the container.
- Refrigerator: For a little longer life, refrigerate in a sealed container for up to 5 days. Warm gently in the microwave before serving.
- Freezing baked scones: Wrap each cooled scone individually in plastic wrap and place in a freezer bag. They freeze well for up to 2 months. To serve, thaw at room temperature and reheat in a 300°F oven for 8–10 minutes.
- Freezing unbaked dough: You can also freeze the wedges before baking. Place on a tray until solid, then store in a freezer bag. Bake straight from frozen, adding 2–3 minutes to the bake time.
Nutrition
Do I need to soak the raisins first?
It’s optional! If you like plumper raisins, soak them in warm water (or even a splash of rum) for 10 minutes, then pat dry before mixing in.
Why are my scones spreading too much?
This usually happens if the butter gets too warm or if the dough is too wet. Make sure your butter is cold, and don’t skip chilling the dough briefly if your kitchen is warm.
How do I get my scones fluffier?
The key is not overmixing. Gently fold everything together and let the oven’s heat do the puffing magic.
