With this step-by-step tutorial, you’ll learn all you need to know on how to easily make pie crust with a food processor or entirely by hand.
Know Before You Scroll

Makes
2 Crusts
Prep Time
20 mins
Resting Time
1 hr
Total Time
1 hr 20 mins
Flavor Profile
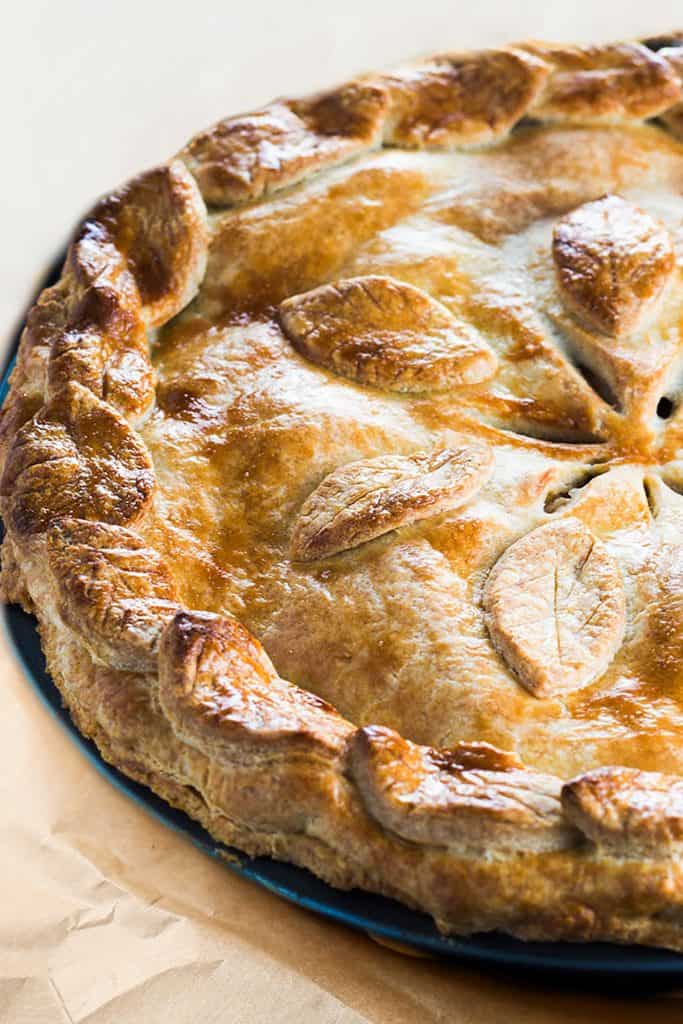
Buttery, flaky, and crisp with a tender bite — the perfect base for sweet or savory pie.
Difficulty Level
Beginner-friendly, with pro-quality results using simple techniques.
Equipment Needed
Large bowl or food processor, rolling pin, plastic wrap, pie dish.
Top Tip
Keep everything cold — especially your butter and liquids — for maximum flakiness.
What You’ll Need
Flour, cold butter, salt, vegetable oil, iced vodka or water.
Ingredient Swaps
Swap vodka with ice water if preferred; use all butter or sub in shortening for a softer texture.
Storage Tips
Wrap dough tightly in plastic and refrigerate up to 3 days, or freeze up to 3 months. Thaw in fridge before using.
A Pastry Chef Upgrade
This pie crust recipe was originally published back in 2020, and it’s been a tried-and-true in my kitchen for as long as I can remember . It’s buttery, golden, perfectly flaky — basically everything a homemade pie crust should be. But! After having a chat with a pastry chef friend (as one does), I found out about a couple genius little tweaks that totally leveled it up. First: tossing the flour with a bit of oil before adding the butter. Game-changer. It lightly coats the flour so you don’t overwork the dough — which means maximum flake . Second: iced cold vodka . Sounds weird, but it’s magic. It gives the dough enough moisture to come together without activating the gluten like water does, so your crust stays tender and dreamy, not tough. I tested, re-tested, and realllly leaned into “just one more test pie” until it was perfect. And now? This is the only pie crust recipe I’ll ever need — and I hope it becomes your forever favorite, too.
Making pie dough from scratch can seem daunting, but it’s really very easy to make. If making pie dough from scratch intimidates you, I promise you that with this guide, you’ll be a pro in no time!
I’m here to walk you through the simple steps so that you can make your own delectable pie dough entirely from scratch. Not only that, but I’m sharing my favorite pie dough recipe that’s foolproof, flaky, and filled with a buttery flavor.
How To Make Homemade Pie Crust
1
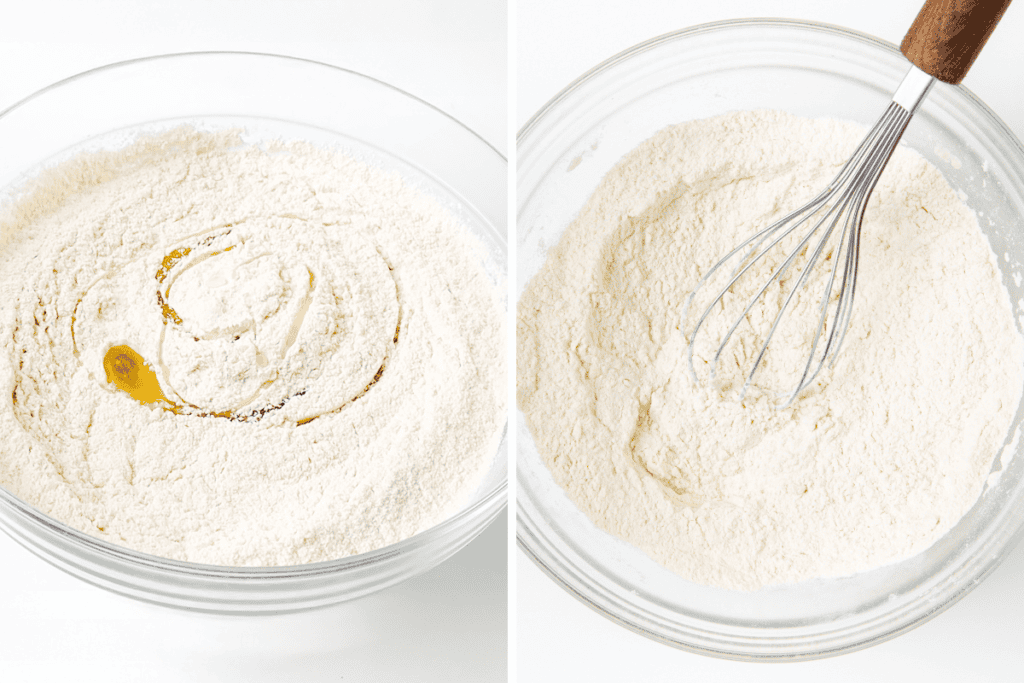
Mix the Dry Ingredients + Add the Oil
In a large mixing bowl, whisk together 2¾ cups (330g) all-purpose flour and ½ teaspoon salt . Drizzle in 1½ tablespoons vegetable oil and gently toss with a fork or your hands to coat the flour. This little step helps keep the dough from getting tough later — and sets the stage for a super flaky crust.
2
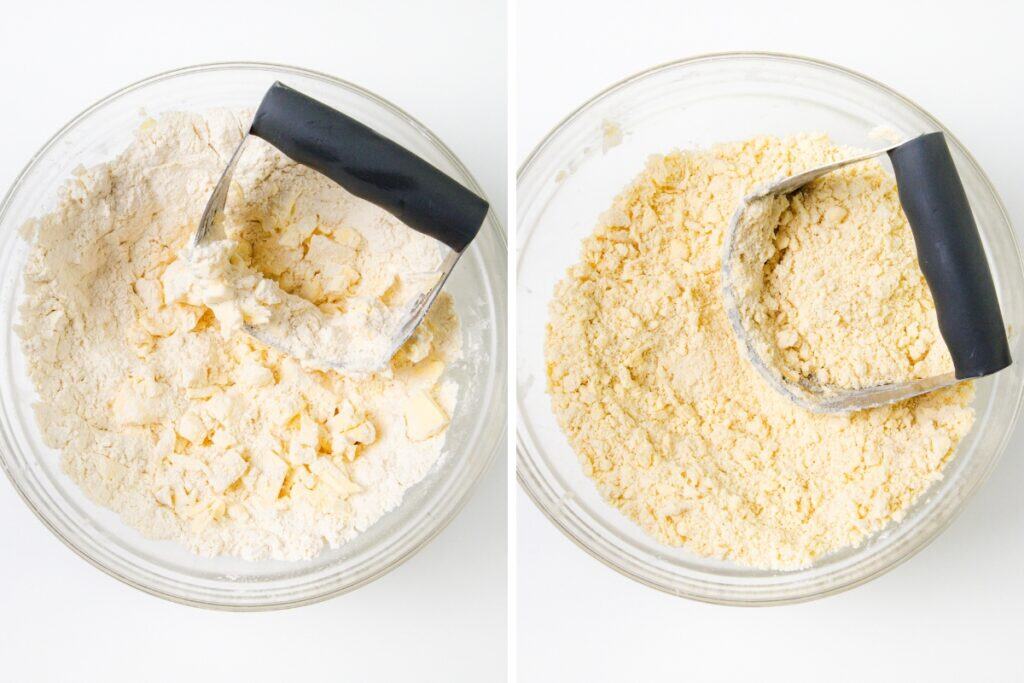
Cut in the Butter
Add ¾ cup (170g) cold unsalted butter , cubed. Use a pastry cutter or your fingers to work it into the flour until it looks like coarse crumbs, with some pea-sized bits still visible. Those buttery chunks are what create the flaky layers, so don’t overmix!
2
Add the Liquid
Add 1 tablespoon at a time of iced vodka or iced water (up to 4 tablespoons / 60 mL total), mixing gently with a fork after each one. When the dough just starts to hold together when pressed (but still looks a little shaggy), stop! Too much liquid = sticky dough = no thank you.
To Dock Or Not To Dock
Poking holes in rolled-out pie dough helps to prevent shrinking of the dough (this is called docking). It also allows steam to escape while baking. Without docking, the steam would build up and cause it to puff up in bubbles and cause pockets in the crust, which causes uneven baking.

Docking is simple to do. After pressing it in and shaping the edge, prick it with a fork on the surface and sides. This is done whenever you need to fully or partially bake the crust before adding the filling.
Tips For Rolling Pie Dough
- Roll & Turn – To start rolling out your disk of dough, lay it on a floured surface and roll outward from the center giving it a quarter turn every few turns. This helps to avoid sticky and makes it easier to keep it round in shape.
- Flour Well as you go by tossing some flour under the dough as needed to keep the dough from sticking
- Roll the dough out several inches bigger than the diameter of your pie pan. It should fall down into the pan easily without being stretched out (causing it to spring back and shrink when it’s baked).
- Use the rolling pin to transfer the dough – Using the rolling pin instead of your hands helps to prevent tears and warming the dough with the heat of your hands. Start at the edge and loosely roll the dough around the pin to easily move it to the pie pan then unroll it over the pan.
- To avoid a soggy bottom crus t, pre-heat a baking stone topped with a sheet pan at 500°F for 10 minutes. Then change the oven temperature to what the recipe calls for before adding the pie to the oven to bake on the heated sheet pan and stone. This helps to form a nicely cooked crust and will catch any leaks from the filling. If you don’t have a stone, the heated pan in the lowest position in the oven will help a lot!
When To Blind Bake Pie Crust
Blind baking is when you pre-bake or partially bake a pie crust before filling it. Here are times this is done:
- When making no-bake pies such as custard-based, or cream pies
- Some pies call for partially baking the crust before adding the filling. This helps to prevent a soggy bottom crust.
Tips For Perfect Pie Crust
- Keep everything well chilled! In order to prevent shrinking and losing flakiness, it’s important to keep all of your ingredients as cold as possible when making pie crust. so be sure to use ice water and well-chilled butter.
- Don’t overwork the dough . It’s important to avoid (over-mixing or overworking the dough, especially when you are adding the water, forming the disk, and rolling it.
- Don’t skip resting the dough . This is an essential step. The gluten in the dough needs time to rest in between steps. This will help the pie crust from shrinking when baked.
- Avoid stretching the dough. Let the dough naturally fall into the bottom of the pie pan so that it is not stretched out. Stretching can cause the dough to shrink during baking. When rolling out and transferring the dough into a pie pan, try to avoid pulling or stretching the dough. If a hole forms or you need to extend the edges on the side, it is better to cut off and press excess dough to form a patch.
- Whisk an egg white with a tablespoon of water and brush it on the top of the dough and around the edges for a shiny golden finish.
- Dust the crust with sugar to give it a nice crunch.
Make ahead and Freezing Instructions
- The disks of dough can be wrapped tightly in plastic and refrigerated for up to 2 days or frozen for up to 1 month.
- If freezing, let the dough thaw completely on the counter before rolling it out.

Ingredients
- ▢ 2¾ cups all-purpose flour
- ▢ 1½ tablespoons vegetable oil
- ▢ ¾ cup unsalted butter (cold and cubed)
- ▢ ½ teaspoon salt
- ▢ 4 tablespoons iced vodka or iced water (ice removed, start with less, add only if needed)
Instructions
- In a large bowl, whisk together flour and salt.
- Drizzle in the oil and gently toss to coat the flour.
- Add cold butter and cut into the flour with a pastry cutter or your fingers until coarse crumbs form. Leave some pea-sized chunks — those melt into flaky pockets.
- Add iced vodka or water 1 tablespoon at a time, mixing gently with a fork just until the dough begins to clump. Press some dough in your hand — if it holds, stop. Too much liquid = sticky dough.
- Divide dough into 2 discs (one slightly larger), wrap in plastic, and refrigerate at least 1 hour before using.
Tips
Erren’s Top Tips
- Keep everything well chilled! In order to prevent shrinking and losing flakiness, it’s important to keep all of your ingredients as cold as possible when making pie crust. so be sure to use ice water and well-chilled butter.
- Don’t overwork the dough . It’s important to avoid (over-mixing or overworking the dough, especially when you are adding the water, forming the disk, and rolling it.
- Don’t skip resting the dough . This is an essential step. The gluten in the dough needs time to rest in between steps. This will help the pie crust from shrinking when baked.
- Avoid stretching the dough. Let the dough naturally fall into the bottom of the pie pan so that it is not stretched out. Stretching can cause the dough to shrink during baking. When rolling out and transferring the dough into a pie pan, try to avoid pulling or stretching the dough. If a hole forms or you need to extend the edges on the side, it is better to cut off and press excess dough to form a patch.
- Whisk an egg white with a tablespoon of water and brush it on the top of the dough and around the edges for a shiny golden finish.
- Dust the crust with sugar to give it a nice crunch.
Make ahead and Freezing Instructions
- The disks of dough can be wrapped tightly in plastic and refrigerated for up to 2 days or frozen for up to 1 month.
- If freezing, let the dough thaw completely on the counter before rolling it out.
Nutrition

Perfect Pie Crust
Ingredients
- 2¾ cups all-purpose flour
- 1½ tablespoons vegetable oil
- ¾ cup unsalted butter cold and cubed
- ½ teaspoon salt
- 4 tablespoons iced vodka or iced water ice removed, start with less, add only if needed
Instructions
- In a large bowl, whisk together flour and salt.
- Drizzle in the oil and gently toss to coat the flour.
- Add cold butter and cut into the flour with a pastry cutter or your fingers until coarse crumbs form. Leave some pea-sized chunks — those melt into flaky pockets.
- Add iced vodka or water 1 tablespoon at a time, mixing gently with a fork just until the dough begins to clump. Press some dough in your hand — if it holds, stop. Too much liquid = sticky dough.
- Divide dough into 2 discs (one slightly larger), wrap in plastic, and refrigerate at least 1 hour before using.
Notes
Erren’s Top Tips
- Keep everything well chilled! In order to prevent shrinking and losing flakiness, it’s important to keep all of your ingredients as cold as possible when making pie crust. so be sure to use ice water and well-chilled butter.
- Don’t overwork the dough . It’s important to avoid (over-mixing or overworking the dough, especially when you are adding the water, forming the disk, and rolling it.
- Don’t skip resting the dough . This is an essential step. The gluten in the dough needs time to rest in between steps. This will help the pie crust from shrinking when baked.
- Avoid stretching the dough. Let the dough naturally fall into the bottom of the pie pan so that it is not stretched out. Stretching can cause the dough to shrink during baking. When rolling out and transferring the dough into a pie pan, try to avoid pulling or stretching the dough. If a hole forms or you need to extend the edges on the side, it is better to cut off and press excess dough to form a patch.
- Whisk an egg white with a tablespoon of water and brush it on the top of the dough and around the edges for a shiny golden finish.
- Dust the crust with sugar to give it a nice crunch.
Make ahead and Freezing Instructions
- The disks of dough can be wrapped tightly in plastic and refrigerated for up to 2 days or frozen for up to 1 month.
- If freezing, let the dough thaw completely on the counter before rolling it out.
Nutrition
Thank you for visiting Erren’s Kitchen!
